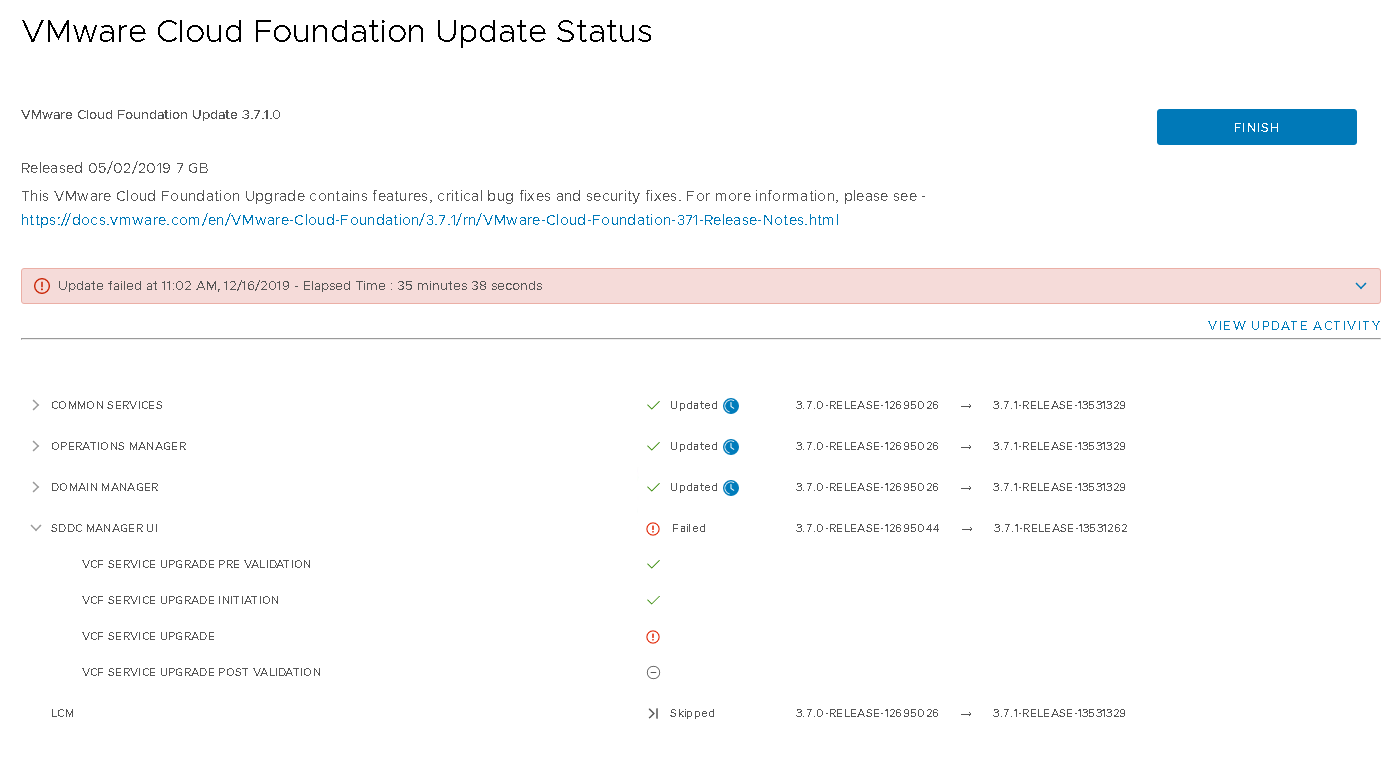
Problem Recap
At a customer we had an issue that came back every SDDC-Manager upgrade within the 3.x versions.
The SDDC-Manager doesn’t seem to start the upgrade of the SDDC-Manager-UI.app service. In the logs there is almost nothing to find of why this isn’t starting. When looking really closely, we see that the RPM is referencing the wrong release version. However the “easy” work-around for this is to install the RPM of the SDDC-Manager-UI.app manually. This issue stopped once we went towards 3.8. Before that we had this problem during the upgrades of 3.0.1.1 –> 3.5 –> 3.5.1 –> 3.7 –> 3.7.1. –> 3.7.2
So let’s see how you can solve this.
Installing the RPM manually on the SDDC-Manager
First, make a snapshot of the SDDC-Manager before you start with these changes.
Once that is done, let’s start to check which RPM the SDDC-Manager is referring to.
Login to the SDDC-Manager with the vCF username, and change it to root.
Then execute the following command:
curl -f http://localhost/sddc-manager-ui-app/about
![]()
It shows that it still refers to the version of 3.7.0-Release, while we actually are upgrading towards 3.7.1.
Before we replace the RPM, we need to connect to the postgressql database on the sddc manager, and clear the persistent state. Type the following:
psql --host=localhost -U postgres -d sddc_manager_ui
![]()
Fill in your password.
Then type:
delete from persistent_state;'
Quite the connection to the database with:
\q
If by any change you cannot seem to login to the postgress database, you can also try to login with root and then select the sddc_manager-Ui database.
Type the command:
psql -h /home/postgresql/ -U postgres
(No password needed, just enter)
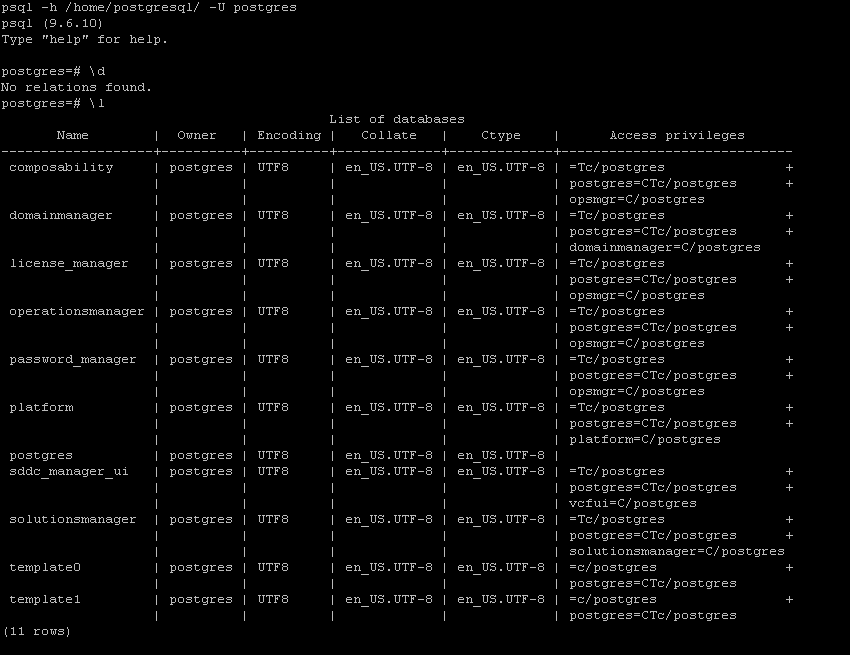
You can list the databases with “\l”.
With the following command you can connect to the database sddc_manager_ui
\c sddc_manager_ui
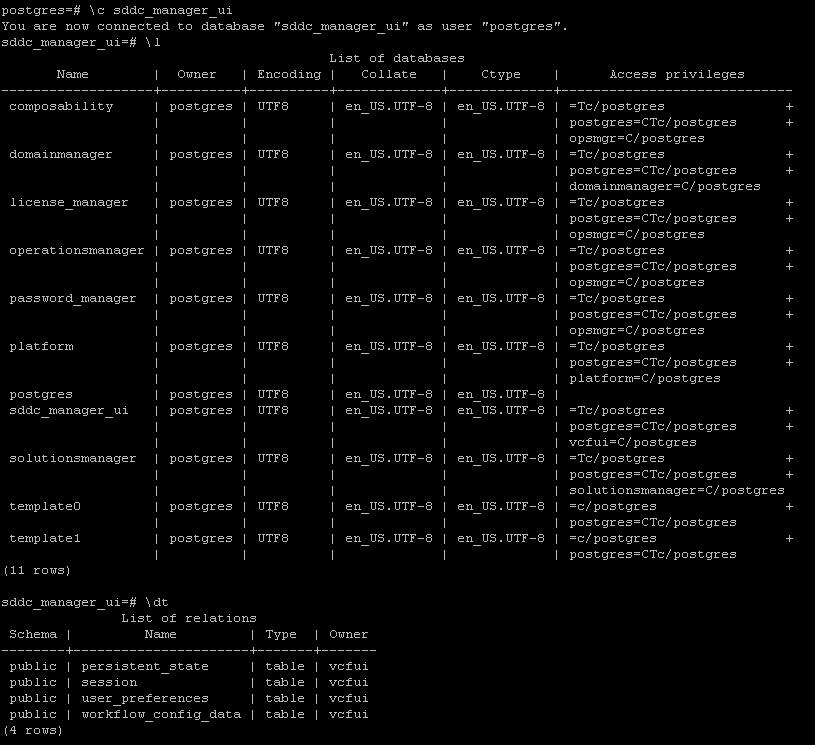
The following command shows the persistent state
select * from persistent_state ;

However we can see that there is nothing there so we don’t need to delete it.
After that it is time to install the rpm Manually.
First need to locate the bundle id and check if it is present in the SDDC-Manager. An easy way to check this is by going towards the GUI (webclient) of the SDDC-Manager, and go to bundles.
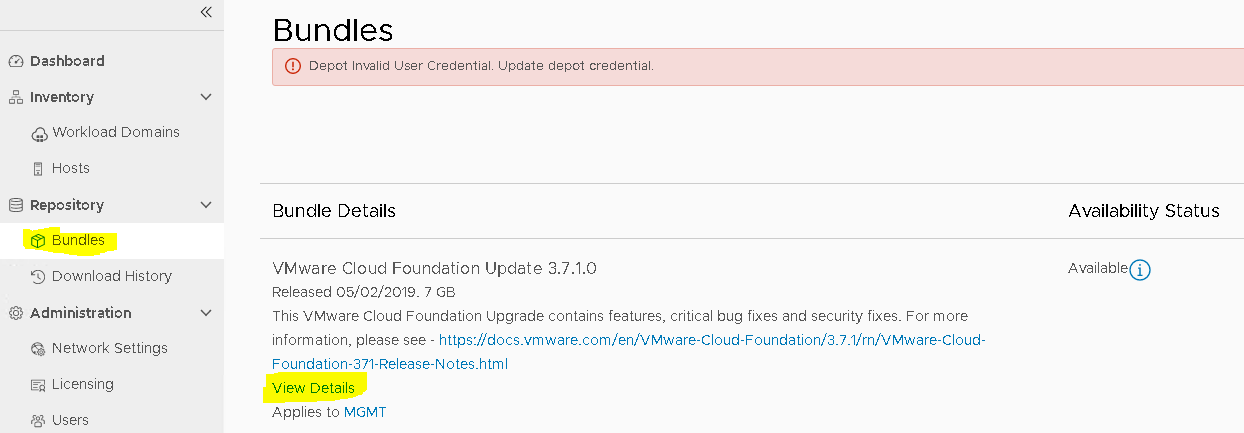
Check the bundle id of your upgrade
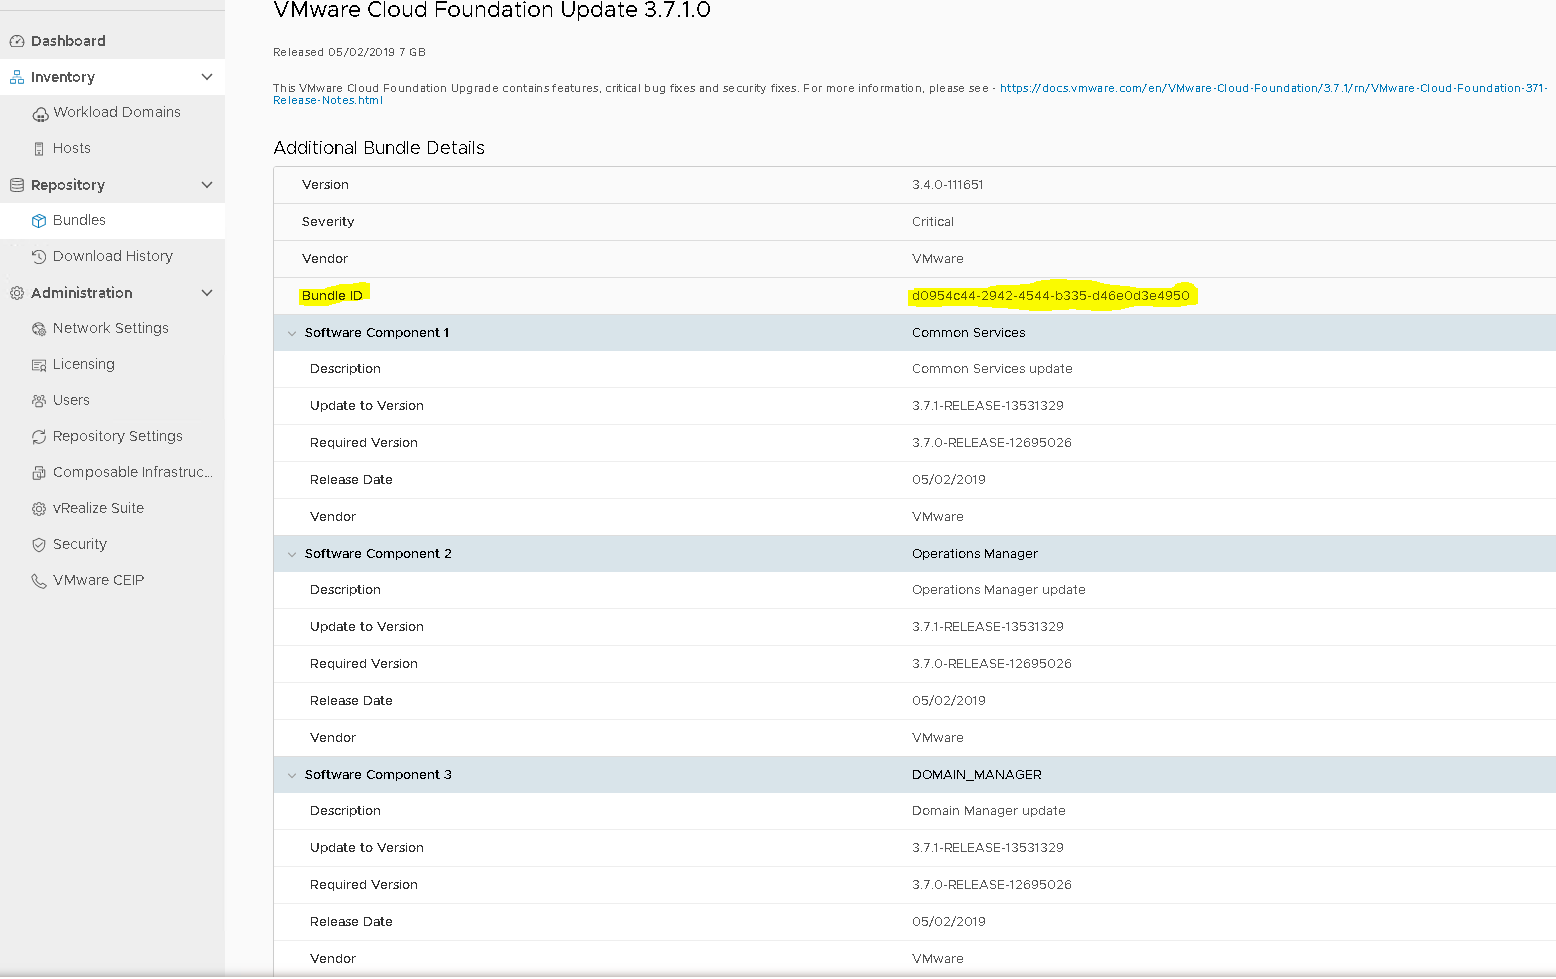
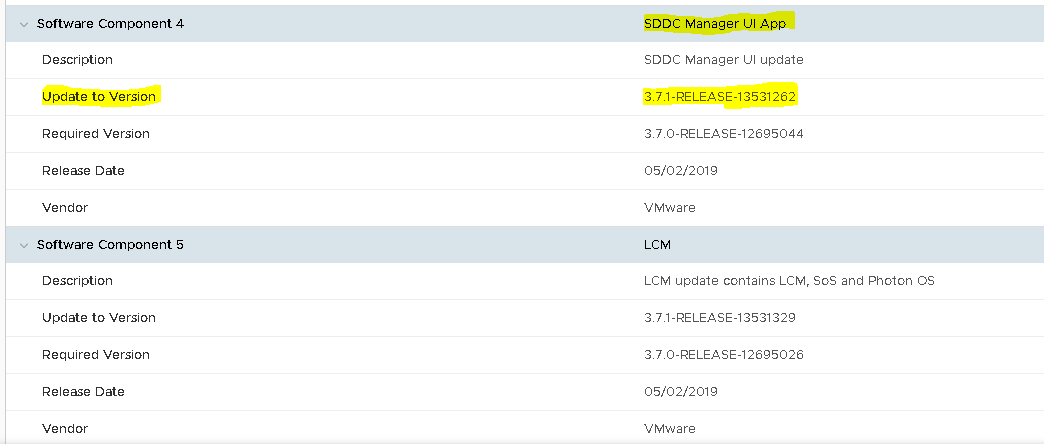
Check the Release version of the SDDC Manager UI App:
Then go back to the SSH connection of the SDDC-Manager and check if you can locate the bundle.
Go to “nfs/vmware/vcf/nfs-mount/bundle”. When you use “ls” to list up the content, you’ll see different bundle IDs.

Change the directory to the bundle id that you have found in the GUI.
List up the content again with “ls” and search for the name “bundle-Number” in our case this was “bundle-11811”.
![]()
Change the directory to that folder.
Then locate the sddc-manager-ui-app-xxx-xxxxx.noarch.rpm with “ls”

In our case this is “sddc-manager-ui-app-3.7.1.-13531262.noarch.rpm”
Check if the release is the same as the one we noted before in the webconsole.
If so, continue with installing the rpm with the command:
rpm -Ufh sddc-manager-ui-app-3.7.1.-13531262.noarch.rpm

Restart the service with the command:
systemctl restart sddc-manager-ui-app
Once this is done, we can reinitiate the upgrade from the SDDC-Manager.

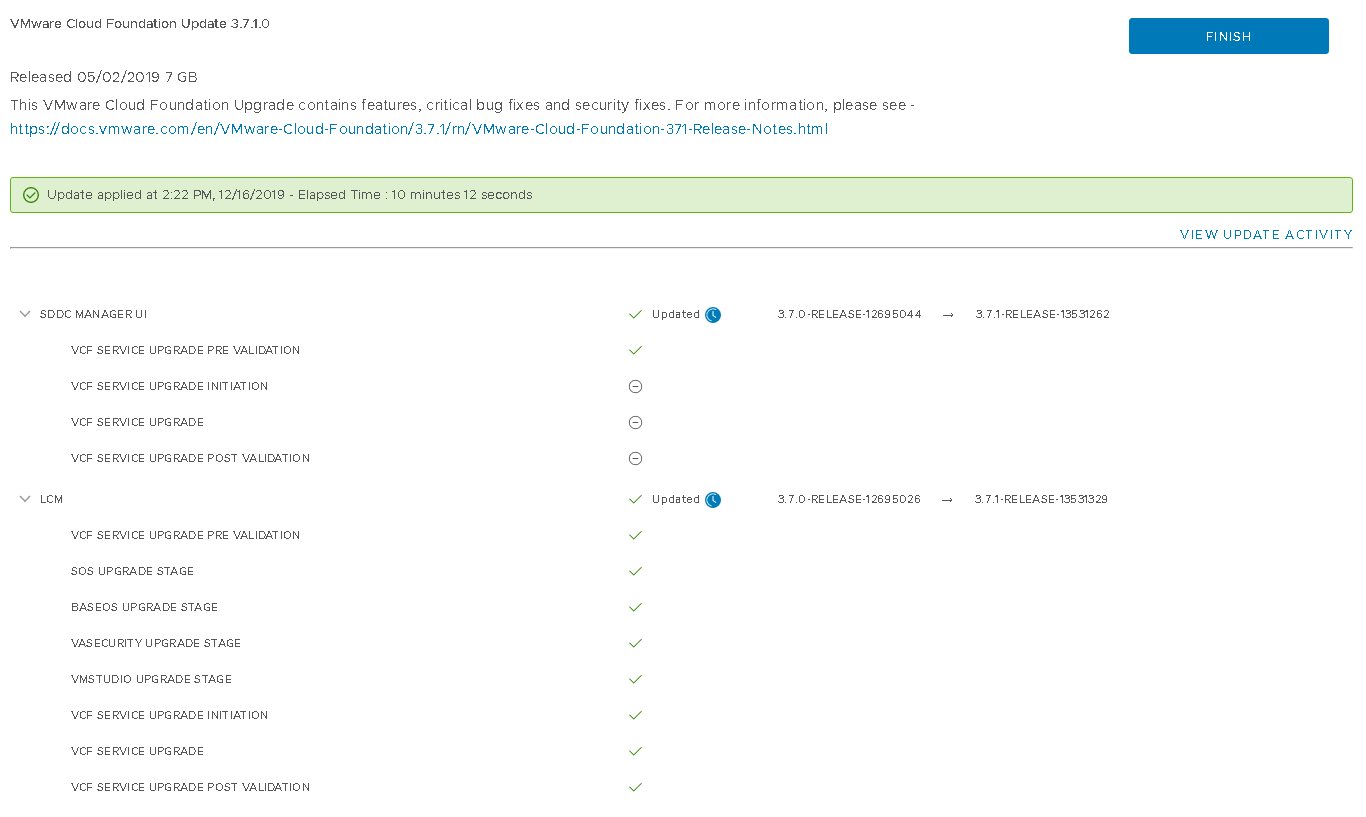
You will see that the SDDC-Manager starts right back at the component of the “SDDC-Manager UI app”, which will be immediately flagged as successful. 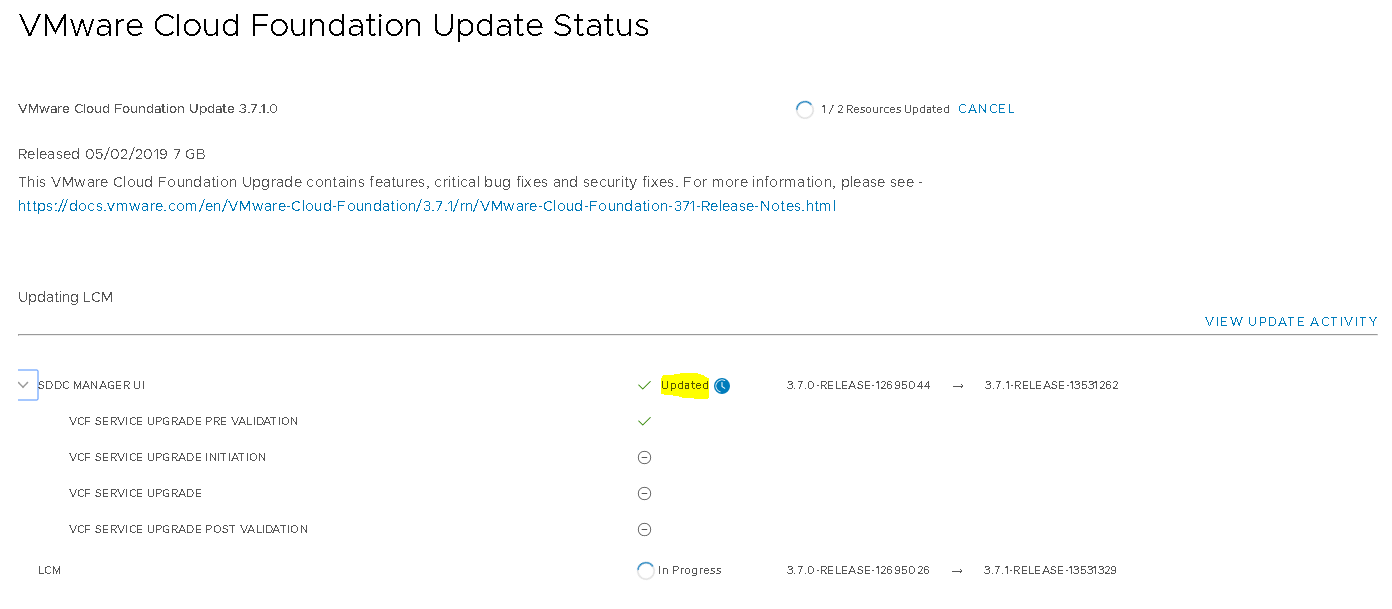
It will then continue with upgrading the last component, which is the LCM.
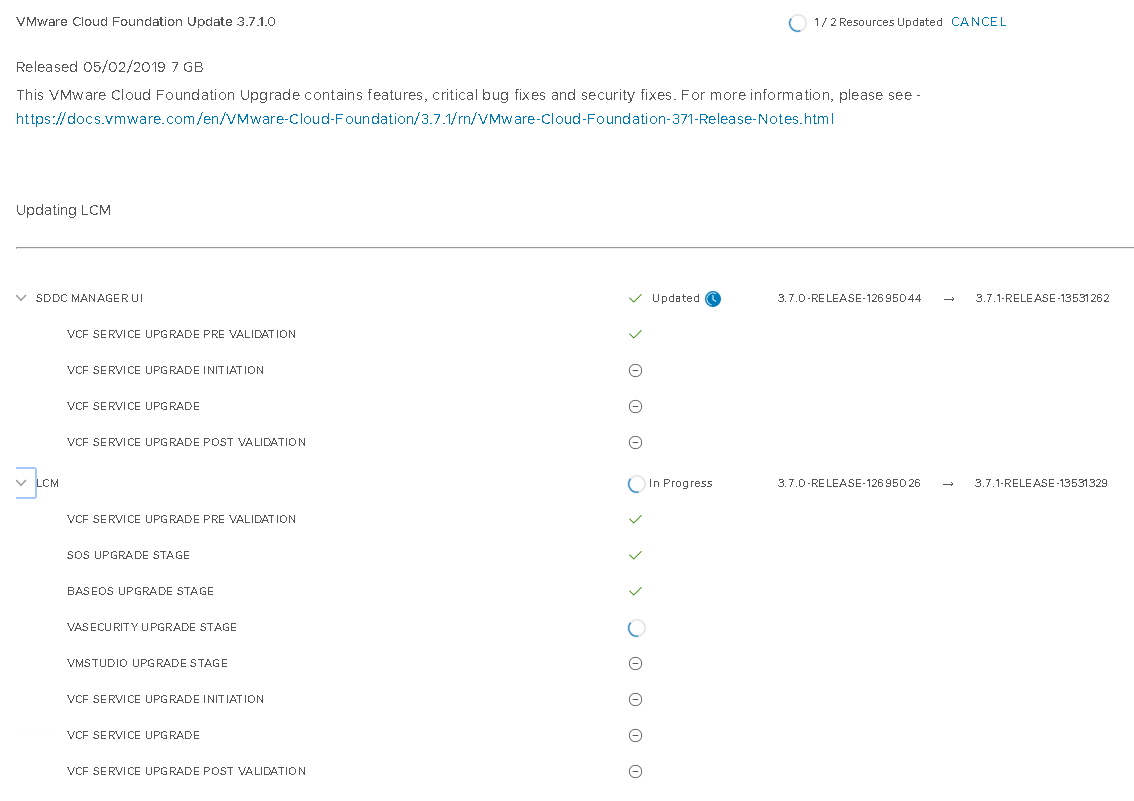
Which it will finish successfully.
I hope this post helps you if you are facing any kind of problem. Do make sure that you have checked the logs closely and make sure that you are not having a different issue. In our case we started to try this out using as a workaround, but eventually had this validated this by GSS VMware. Who have confirmed that we could continue the upgrade this way.

Samir is the author of vSAM.Pro & a Life enthusiast who works as a consultant in the field of IT. With a great passion for Tech & Personal Development, he loves to help people with their problems, but also inspire them with a positive outlook on life.
Besides that, he is also a big Sport & Music junky that loves to spend a big chunk of his time on producing music or physically stretching himself.