Intro
ESXi hosts that uses Vendor specific ISO’s need a bit of extra care when you want to use them for vCF upgrades. In this document we’re going to do a step by step tutorial for upgrading ESXi hosts in vCF with custom ISO’s. This procedure only applies for vCF deployments that are on 3.5. If this is not the case, you can also make use of a different procedure, which can be found here:
https://www.vsam.pro/vcf-3-x-esxi-upgrade-procedure-for-custom-vendor-iso-vcf-3-5-1-higher
This document is only needed if you want to use a custom ISO. If you are not using a custom iso, then you can just simply upgrade each domain through the SDDC-Manager and you don’t even need this procedure and you can stop reading 😉.
Guide
Official documentation for this can be found here:
https://kb.vmware.com/s/article/65047
This document follows the kb article, but with my own recommendations.
I would suggest to check both this document as well as the original kb article, so that you are sure that you don’t miss anything.
Prerequisites
First, make sure that you have done all the prerequisites. In this case, you have to upgrade the vCenters & NSX components for each domain within the vCF deployment. This needs to be done for (all) the workload domain(s) as well the management domain. Make sure that you have done that before you start with the Custom ESXi upgrade procedure.
Once you upgraded the SDDC-Manager, NSX-V & vCenter to the BOM version in 3.5, you can start downloading the “Standard” ESXi Bundles for the ESXi hosts within the SDDC-Manager.
Step 1 – Download the CustomESXiFix.zip file
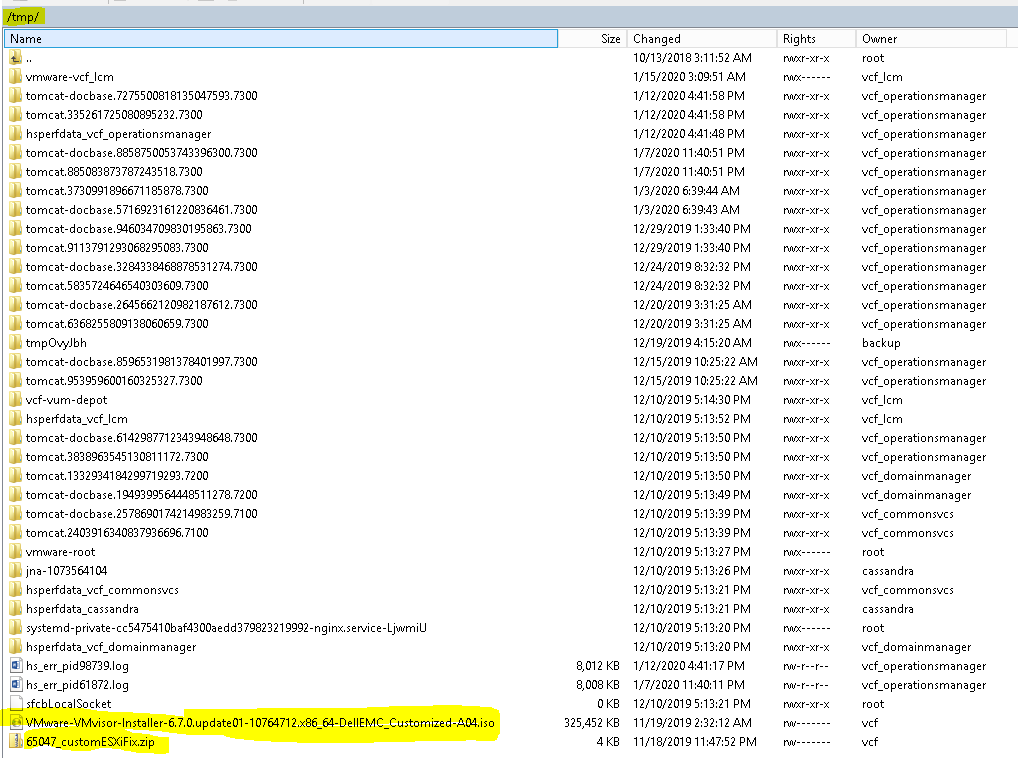
First, go to the page of this kb article 65047, and download the “65047_customESXiFix.zip” file that is in the attachments section. 
Save it to your drive, we are going to upload this later together with the custom vendor ISO.
Step 2 – Choosing the right Custom ISO of your vendor
In order to use a custom ISO, there are a few rules you should hold onto, in order for the upgrade to run smoothly. At least, that is what me and my colleagues found out the hard way.
When you use a custom ISO, make sure that the Vendor used the same build number as the one that is being used by vCF for the upgrade. This is simply the easiest and best way for your upgrade to work. If however, this is really not possible, since your vendor skipped a certain build number, you can use a divergent build number in your custom iso. However, this should be as close as possible to the original ESXi Build number within vCF, and definitely not higher. If this is higher, you’ll risk that the upgrade will fail, or that your vCenter doesn’t support it. Best way is to always stick to at least the same major release. An update like 6.7 u1 or u2 is also considered as a major release. Everything between the updates is considered as a minor upgrade & release.
In our case we want to upgrade from vCF 3.0.1.1 to 3.5. The ESXi build version that is being used in vCF 3.5 for the ESXi hosts is 10764712. This build also known as ESXi 6.7 u1 (patch 5). In our case we have the exact same build number from our vendor, which was Dell in this case. However if wanted to use a different version, it has to be at least 6.7 u1 and not higher then patch 5. If you want to know more about Release versions and build numbers within ESXi, check out this kb article:
https://kb.vmware.com/s/article/2143832
One last tip. You don’t need to use a custom ISO for every ESXi upgrade within vCF. The only time that I use a custom ISO, is when vCF is upgrading the ESXi hosts to a major version. With the minor versions I just use the standard image that the SDDC-Manager uses. This doesn’t overwrite the 3th party vibs, as long you don’t have a Major upgrade.
Step 3 – Upload the files to your SDDC-Manager
Make a snapshot of the SDDC-Manager and upload the zip file and custom ISO with a transfer utility tool in the /tmp folder.
After that we’re going to change the config of the SDDC Manager.
But first, we do a precheck, and check if everything is green.
In case the “vSAN Health HCL INFO HEALTH Check” fails, we also need to make an adjustment for that in the config of the SDDC-Manager so that it will safely ignore those errors.
In our case, this didn’t happen but I will summarize the steps you should take to fix this later. More info can be found here in the same kb article 65047. If the rest or everything is green, you can proceed with the following.
Step 4 – Changing the SDDC-Manager Config
Log into the SDDC Manager VM with SSH as the vcf user and switch to the root user by issuing the
su – command.
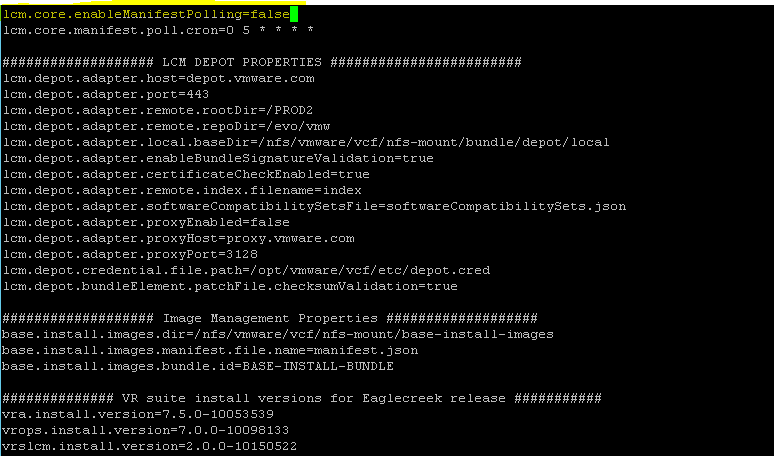
- Open the /opt/vmware/vcf/lcm/lcm-app/conf/application-prod.properties file with a text editor like vi.

- Find the lines that read:
lcm.core.enableManifestPolling=true
and change true to false.
If you didn’t had the vSAN error in the precheck, you can save the file and skip the next step.
————————Only needed for the vSAN Error in the precheck——————————————–
If you had the vSAN Error in the precheck mentioned earlier, search in the same (application-prod.properties) config the following lines:
vsan.healthcheck.enabled=true
vsan.precheck.enabled=true
and change true to false.
- Save and close the file.
- In the vSphere HTML5 Client, select the cluster and navigate to Monitor–>vSAN–>Health–>Hardware compatibility–>Controller driver is VMware certified.
- Click the Silence Alert link.
- If there are any other triggered vSAN alarms such as MTU mismatch, these will need to be silenced as well otherwise the upgrade will fail.
———————————————————————————————————————————-
After that, save the file and quite it.
Now restart the lcm service with the command:
Systemctl restart lcm
![]()
Step 5 – Run the customESXiFix script
First unzip de zip file that you uploaded in the tmp folder with (Make sure it is spelled right):
unzip -d /tmp/ /tmp/65047_customESXiFix.zip file

After that we are going to run a command that instruct the SDDC-Manager to use the Vendor Specific ISO. The command for this is:
python /tmp/customESXiFix.py uploadcustomESXi --esxi-version=6.7.0-<build value from ISO> --bundle-id=a6beb0a7-774d-4ece-accc-1cfe68365c15 --custom-iso-path=/tmp/<iso file name>
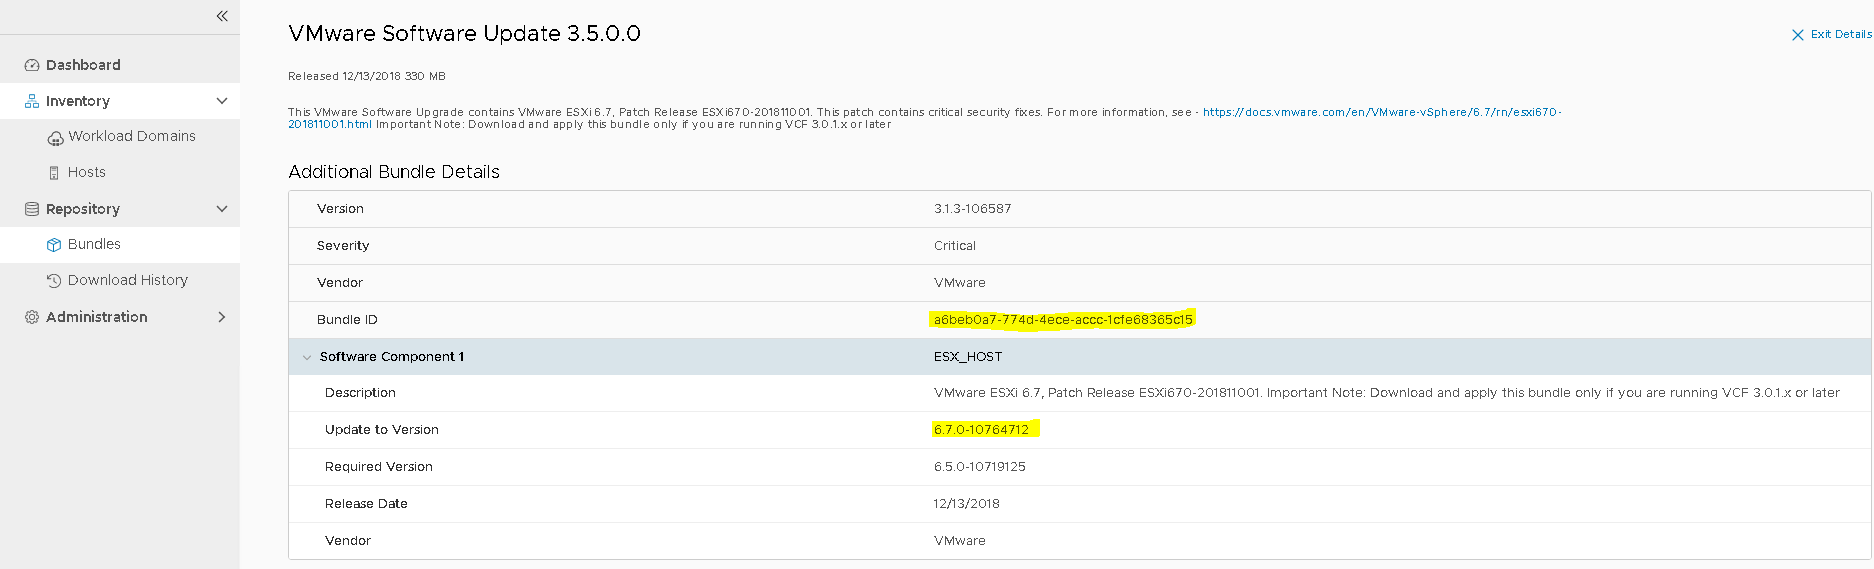
You can find the bundle id of the Standard ESXi Image in the Repository.
In our case the command turned out as:
python /tmp/customESXiFix.py uploadcustomESXi --esxi-version=6.7.0-10764712 --bundle-id=a6beb0a7-774d-4ece-accc-1cfe68365c15 --custom-iso-path=/tmp/VMware-VMvisor-Installer-6.7.0.update01-10764712.x86_64-DellEMC_Customized-A04.iso
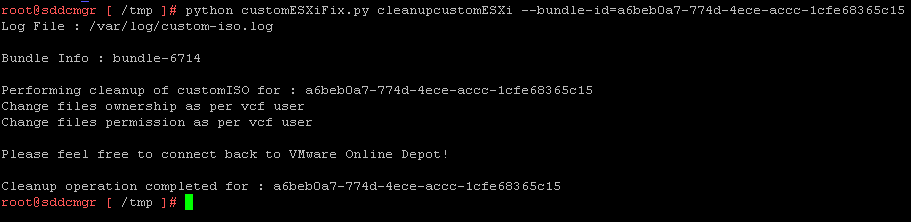
Running it will give you the following message:
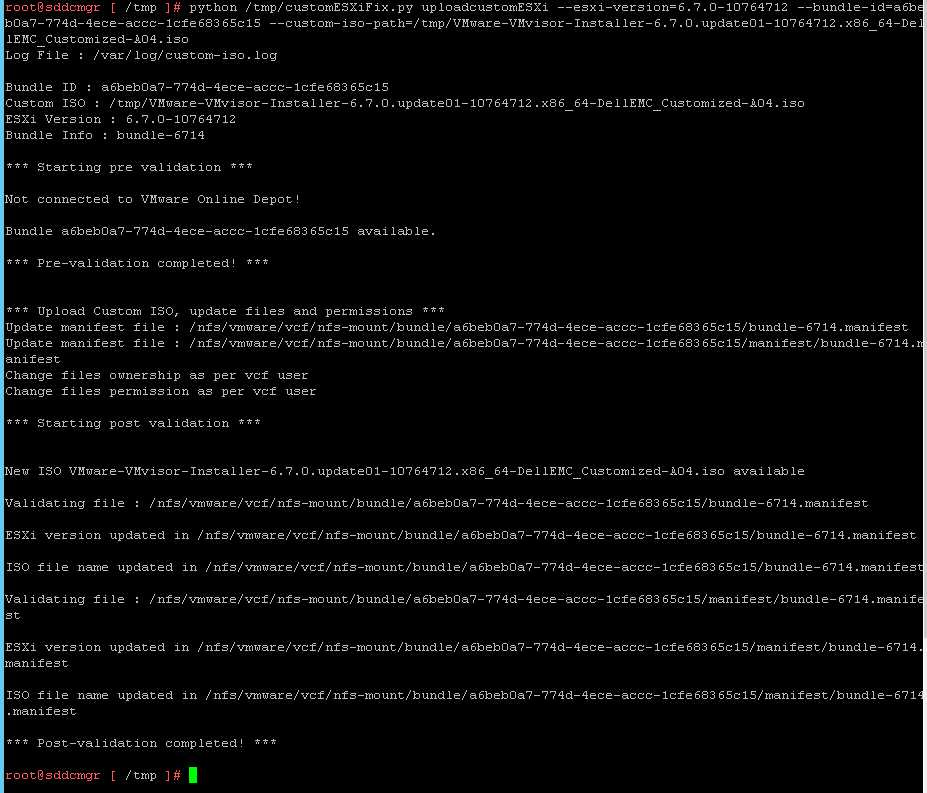
After running the script, you are ready to start the upgrade.
Step 6 – Start the upgrade from the SDDC-Manager
As an extra precaution, I wanted to make sure that I could validate if this procedure worked. So I checked the third party vibs of the host and noted them down. 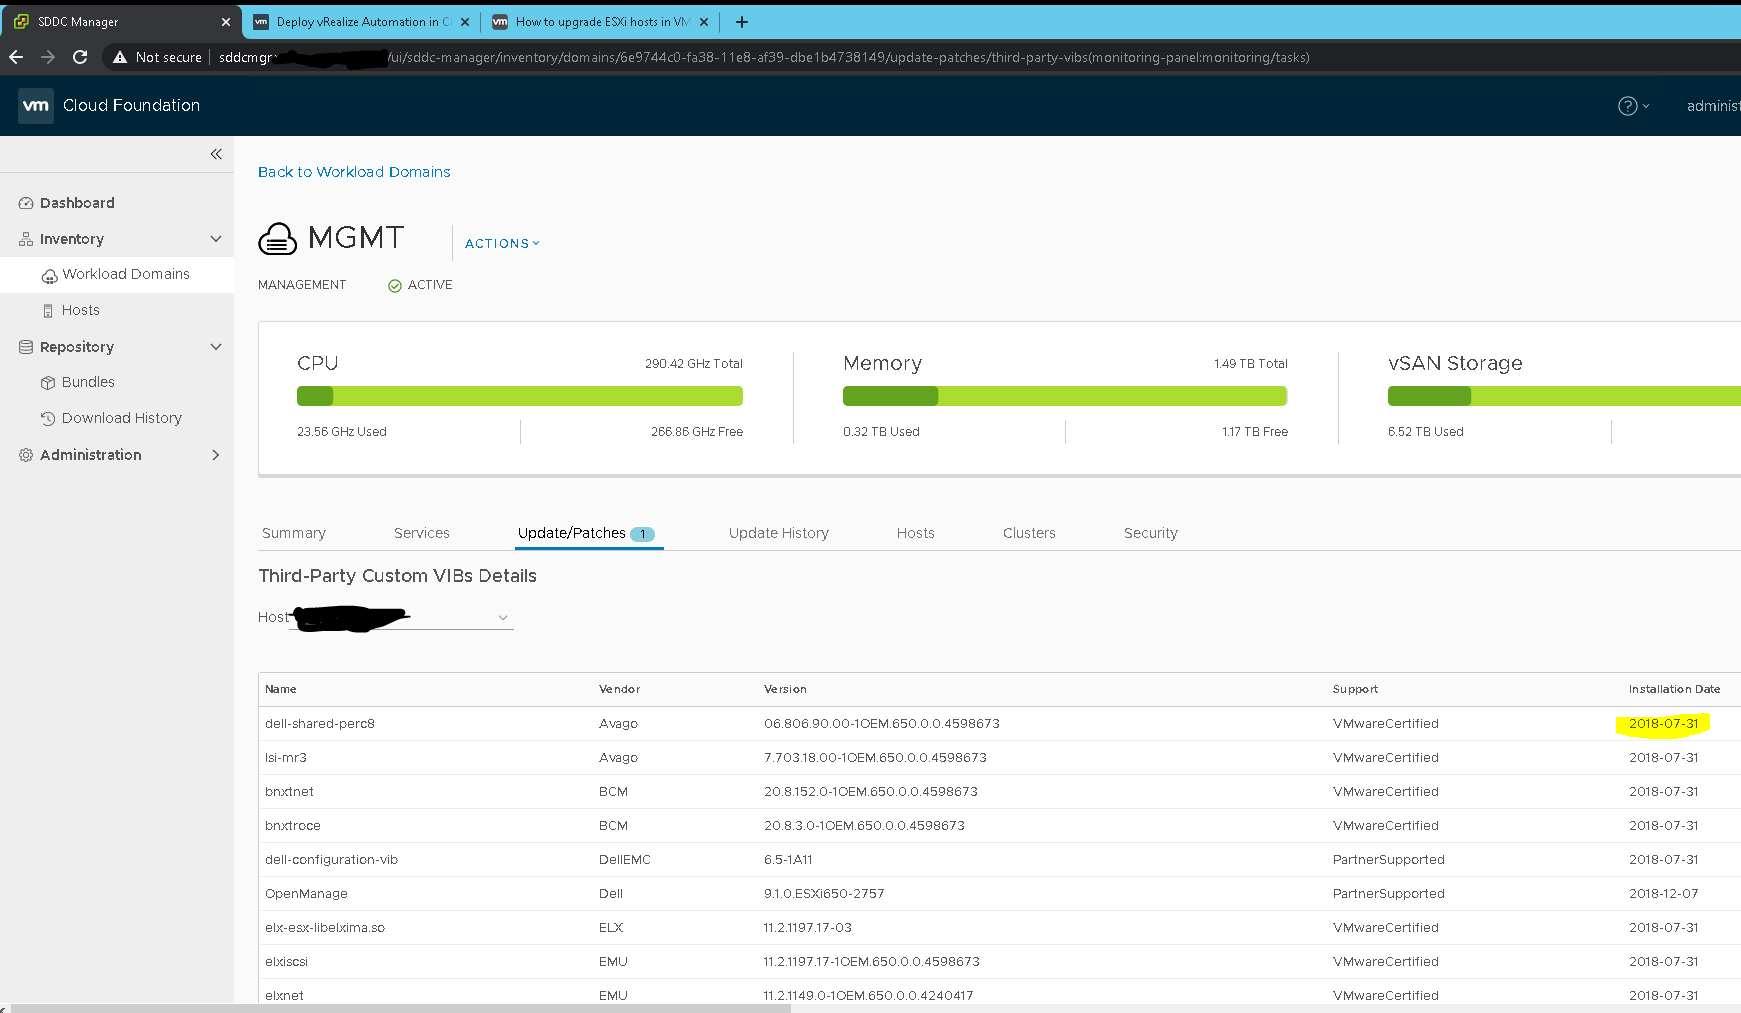
I then ran a last precheck. 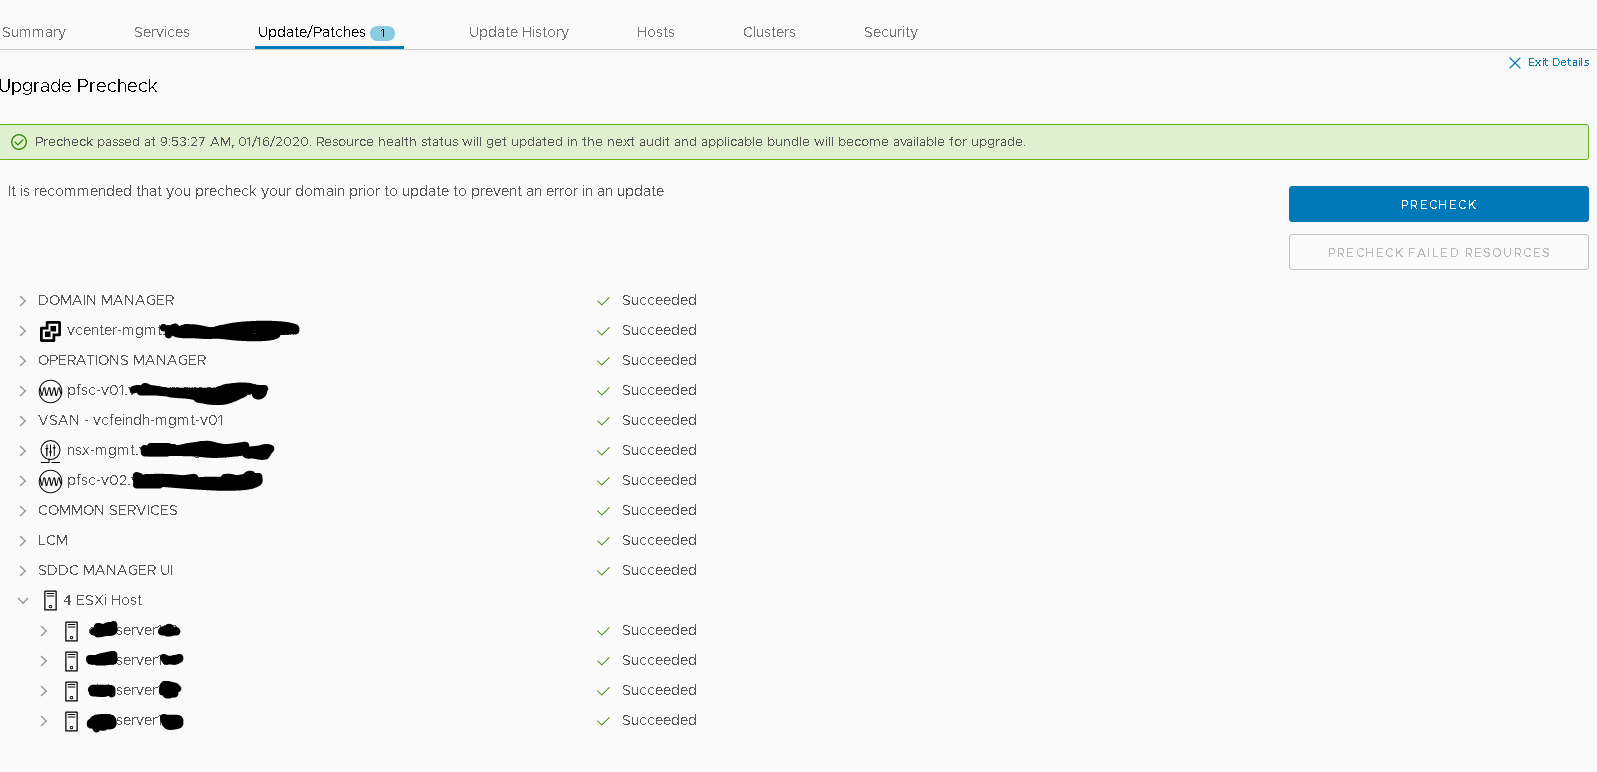
And after that started the upgrade. 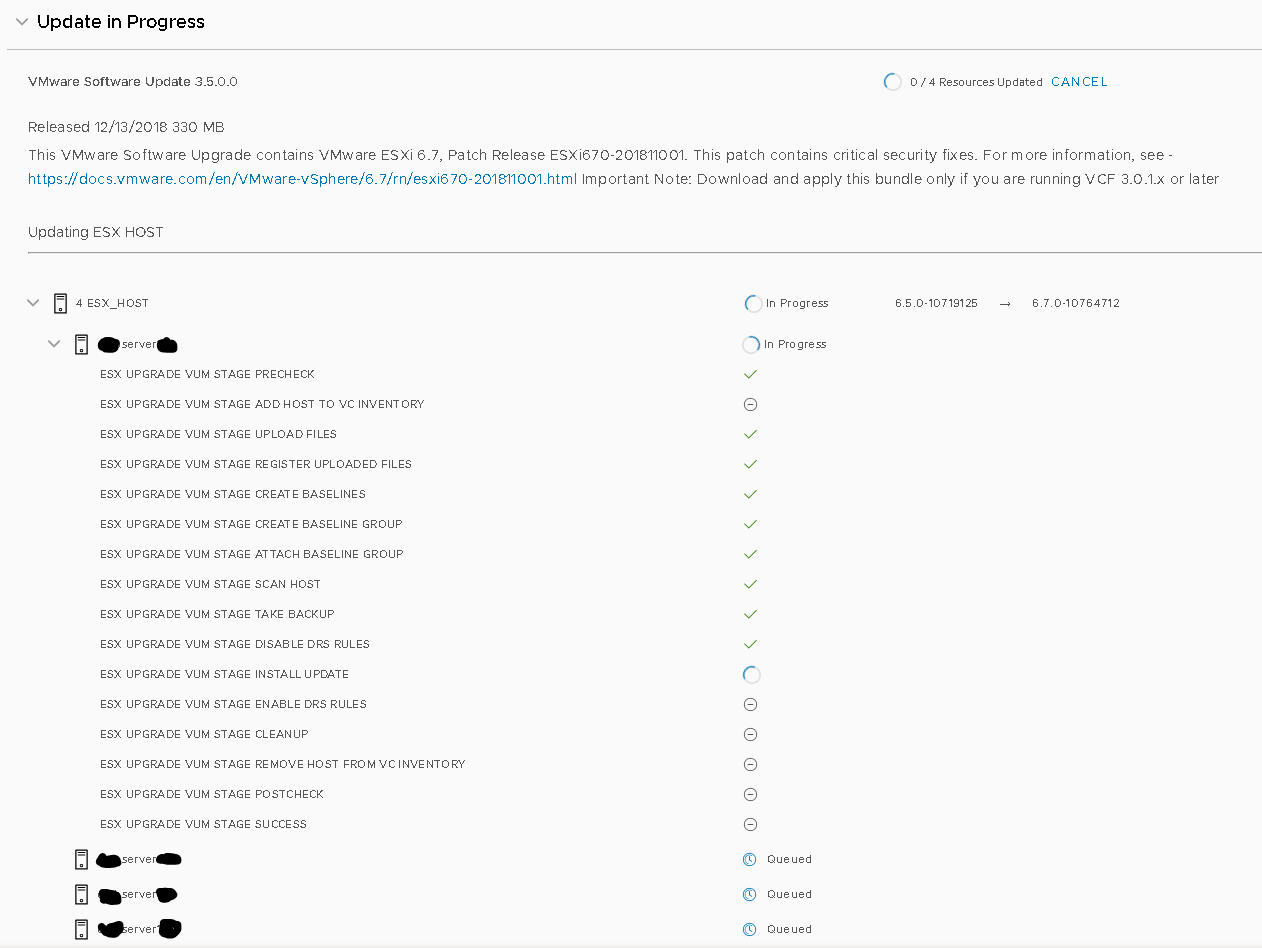
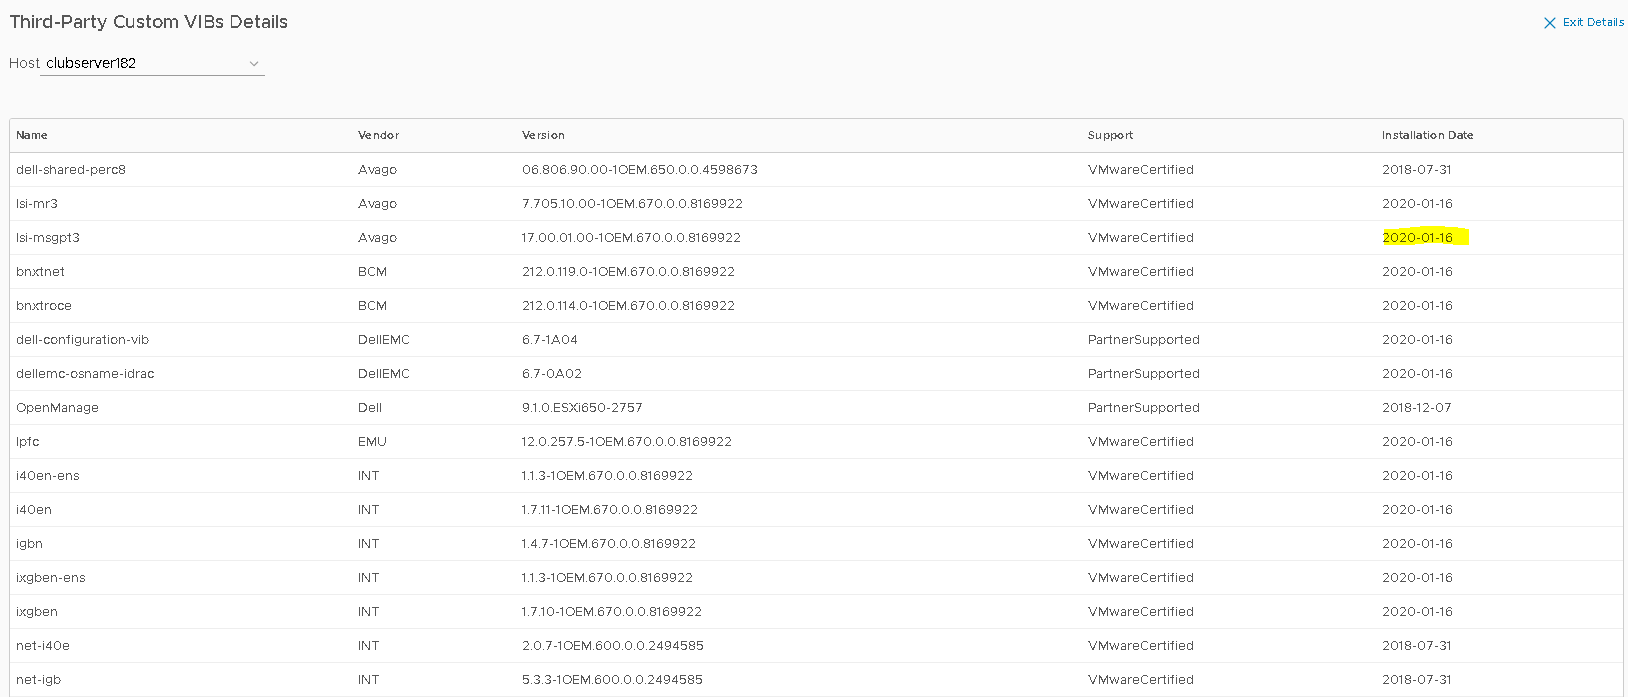
Once the upgrade was finished, I could see that the ESXi hosts had updated certain vibs, which means that the procedure worked.
If this didn’t work for, you should update the vibs manually, or wait for the next ESXi upgrade to retry a different custom ISO procedure. Since a different option is possible in version 3.5.1 and higher. Btw, I wouldn’t recommend to use the skip host procedure to test this, which is mentioned in the kb article. It can create more problems then it can help you to prevent, just a word of advice.
Step 7 – Revert & undo the changes in the SDDC-Manager config
After the upgrade, we need to revert and reset some of the changes that we made.
Open up a SSH connection to the SDDC-Manager.
Issue a command similar to the following to instruct VMware Cloud Foundation to reset the VMware Software Update 3.5.0.0 (VMware ESXi 6.7, Patch Release ESXi670-201811001) bundle to it’s default configuration:
python customESXiFix.py cleanupcustomESXi --bundle-id=a6beb0a7-774d-4ece-accc-1cfe68365c15
Note: This command was tailored specifically for upgrading ESXi hosts to the VMware Cloud Foundation 3.5 version (vSphere 6.7 U1) and the bundle-id noted is specific to that release. If a different future release is desired, update the bundle-id value as appropriate. The bundle-id value can be obtained from the Details page of the applicable VMware Software Update bundle.
- Delete the vendor-specific ISO image from the /tmp folder on the SDDC Manager VM.
- Revert all changes made to the /opt/vmware/vcf/lcm/lcm-app/conf/application-prod.properties file which we did earlier in Steps 4and 5 to their default values.
- Revert the change made to the Controller driver is VMware certified alert in Step 4 e,f if you had any vSAN issues and made those changes.
- Open the /opt/vmware/vcf/lcm/lcm-app/conf/VersionAlias.yml file with a text editor.
![]()
- Add a stanza similar to the following immediately after the versionAliases: line:
ESX_HOST:
- base: 6.7.0-10764712
alias:
- 6.7.0-<Custom_ISO_build_no>
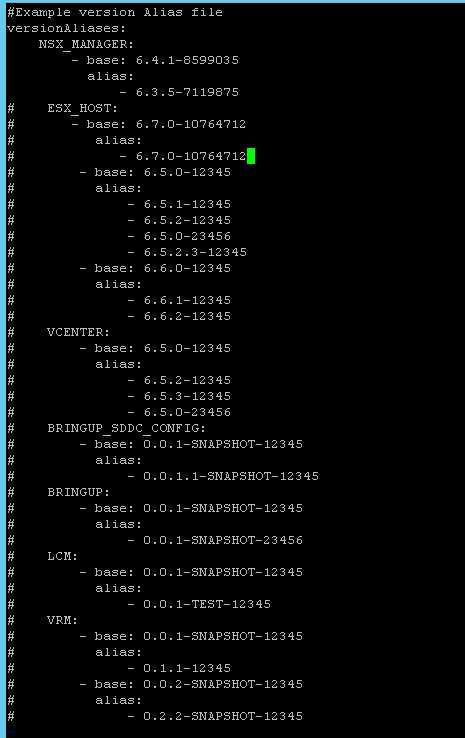
Note: I added a “#” so this change didn’t go into effect, because I didn’t think this was needed since we had the same version. If in case you used a different version, this last step will probably make more sense. After that restart the lcm service and your done.
Command:
systemctl restart lcm

Samir is the author of vSAM.Pro & a Life enthusiast who works as a consultant in the field of IT. With a great passion for Tech & Personal Development, he loves to help people with their problems, but also inspire them with a positive outlook on life.
Besides that, he is also a big Sport & Music junky that loves to spend a big chunk of his time on producing music or physically stretching himself.